
The ZMR-X210 is an evolution of the ZMR design, in keeping up with the changing times this ZMR was re-worked from the ground up. We are not just modifying the arms to give a "X" type of layout, we have re-worked it entirely to provide what the modern user wants.
ZMR-X210 features an X design which is currently the most popular mini quad layout. This mini quad frame has nothing like the old ZMR250 and it was created from the ground up.
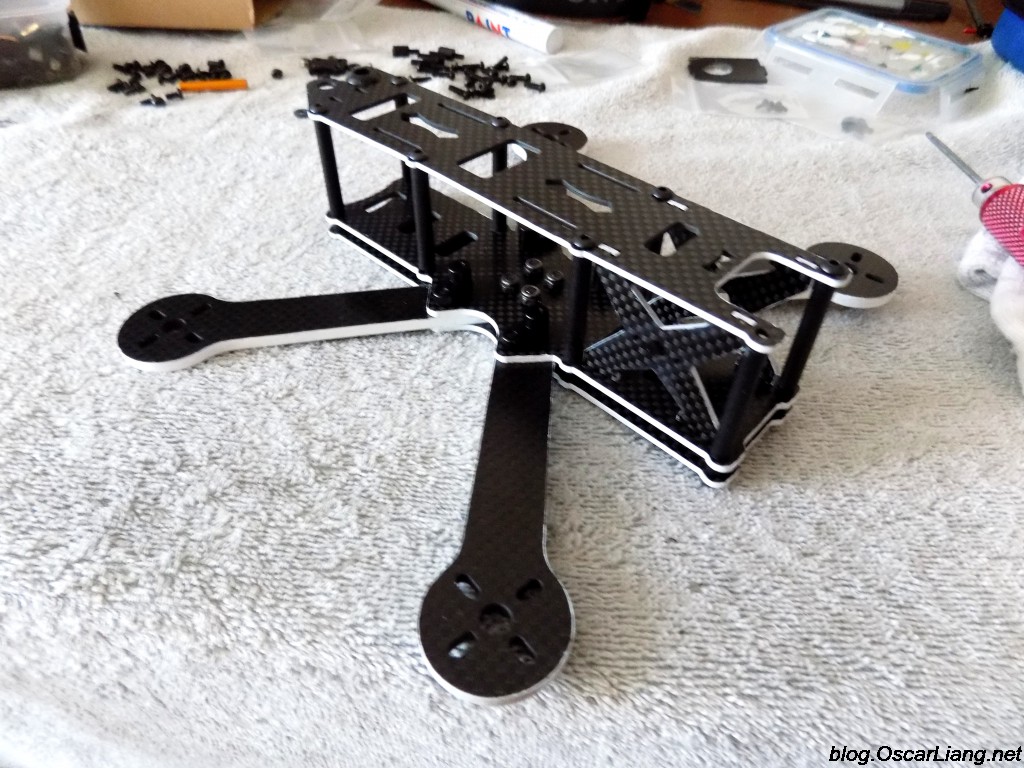
Get your ZMR X210 Frame from FPVModel. The frame was built by SiRDoGG8u.
Unboxing
First thing that I noticed during unboxing was how well the frame was packed. All carbon parts were packed separately so there was no way for the carbon to get scratched, All hardware was in different bags, which made it easy to sort the screws needed for the build.


I do like to say I am very impressed with the carbon and how it looks, with no jagged edges.


Weight: 97g carbon fibre parts without hardware – 145g assembled.
Quick Release Fixings
One great feature is the what I would call “Quick Release Fixings” aluminium mounting hardware, it allows you to swap out arms more quickly. Basically they are threaded spacer that are shared by multiple bolts, when you unscrew one bolt the spacer will still be supported by other bolts and stay where they are, therefore you only need a screw driver and no pliers required. You don’t even need to remove the top plate to change arms any more.
I started to build and attach the arms using the quick release fixings when I came across
the centre fixing for the arms wouldn’t screw into mount, after examination and removing the arms, i found the mount that holds the middle screws for the arms, the holes didn’t line up (below picture).
the centre fixing for the arms wouldn’t screw into mount, after examination and removing the arms, i found the mount that holds the middle screws for the arms, the holes didn’t line up (below picture).

So without getting the Dremel out to drill the carbon and make the holes too big I scrapped the mount, and just used M3 locking nuts , only issue with doing this is you can’t do a quick swap if you break an arm, so that is the first negative point I found , hopefully they will sort this out soon.

Arms
They have done a nice touch with the spacers that are used between the 2 bottom plates: the spacers are threaded, and you don’t lose the screws and spacers, when the standoffs are removed for any reason.

The ZMR X210’s arms are sandwiched by a double bottom plate structure like the good old ZMR250. However on this design you can optionally use only 1 bottom plate to save weight, the trade-off would be reduced strength against crashes.
Comparing to the good old ZMR250 arms.

2 Camera Options
Similar to the DemonRC NOX5, you get 2 different options of FPV camera mounting.
This is the for cameras with a case.

And the mounting plate is for board cameras.

Building
Finally after fully building the ZMR-X210, I found the 2nd mistake to this frame.
I painted the edges of the carbon fibre with white colour “Tyre Marker”. You can also use nail polish but tyre marker is easier IMO.
3 standoffs wasn’t threaded enough to take the screws provided, so in the end
I had to use washers as I never had M3 screws that was short enough.
I had to use washers as I never had M3 screws that was short enough.
Here is the parts list I used in this build:
- Naze32 Rev6
- Littlebee 20a
- Skyzone TS5823 200mw
- Fatshark 700tvl FPV camera (Metal Cased)
- T-motors MN2204/2300kv
- Props: DAL 5×4.5×3 V2
- Delta8 PPM RX
Picture of it fully built:
The next issue I had was when installing the motors to the arms (t-motor 2204/2300kv) I found that you have to be perfect with the lining of the shaft as the C-clip rubs the whole drilled in the arm. But with cobras and many other motors that should not be an issue.
After that the frame was a joy to build with no other problems, the frame is nicely designed and has some similar looks to the Lumenier raceblade. No where near the same but some nice touches and detail to attention on this frame.
Pro’s and Con’s
Positives
- The frame looks strong and carbon is cut very good indeed, I was impressed and I think it’s worth the money if the few negatives get sorted out
- Clever solution for quick arm release, and some nice touches for simple fixing and breakages
Negatives
- Unless it was just the one I received but the holes on the quick release fixing for the centre of arms don’t line up
- The standoffs thread needs to be tapped deeper, at least the length of the screws provided
- And may be the holes where the shafts sit on the arms need to be 1mm 1.5mm bigger
Overall the frame is a nice looking frame and well worth a buy imo


Here is a test flight.

No comments:
Post a Comment